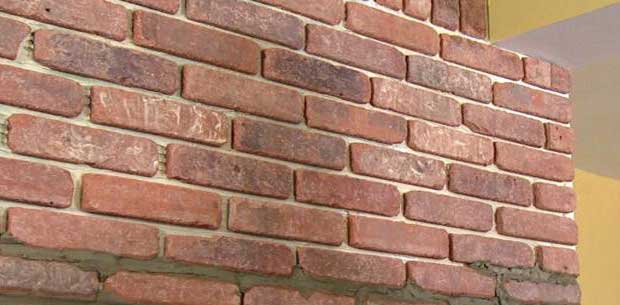
Brick veneer is a non-structural layer of brick used in construction of buildings, placed at outer layer, generally backed by an air space. The materials used in brick masonry work and that in brick veneer are same, however, they differ in the construction technique used while placing bricks. In case of brick veneer, inner layer may be that of wood, metal or concrete. Before we move into the topic, it is necessary to understand the fine difference between Brick veneer and brick masonry work.
Contents:
Stone Brick vs Brick veneer
The basic difference is that in house built of stone brick wall, brick or stone wall supports the structural loading. While in case of brick veneer, it doesn’t support loading of house. It is usually applied for decorative purposes. If you remove the brick veneer from the wall in the house, the house will continue to stand still without falling down. In case of stone brick house, the structure will fail if you take out the bricks or masonry from the wall.
In case of stone/masonry two layers of brick or stone is applied for constructing the wall. In case of brick veneer, single layer of wall (external) is constructed using brick. While inner layer is constructed using wood, metal, stone or concrete blocks. Undoubtedly, stone walls are stronger; however, brick veneer walls are strong enough and better insulated.
Advantages of Brick Veneer
Following are the advantages of brick veneer:
- It is relatively easy to install and can be completed in shorter span of time.
- Less man-force or labour is required.
- The brick veneer walls have less weight in comparison to different masonries. This reduces structural loading due to which economies expended on structural & foundation support is saved.
- Cavities on brick veneer wall can act as an insulating agent.
- It looks fancy, needs little maintenance. It does not need painting either.
- They are durable and fireproof.
How to install brick veneer
The steps of installing brick veneer in a wall are thoroughly explained below:
Step 1: Preparing wall for tile – First of all, make sure that the wall where brick veneer is to be applied, is clean and smooth. Dust & debris makes it difficult for the glue to bond properly. Keep level & ledger for placing the bricks.
Step 2: Cutting the bricks – After you finish cleaning, you can start cutting the bricks with the help of diamond blade grinder or saw.
Step 3: Installing corner bricks – Start installing from the button corner of the wall by pressing a full brick to the outer edge of the lower corner of the wall. Continue upward with a half cut thin brick in a pattern of full-half-full-half alternately.
Step 4: Installing full rows – Same pattern has to be followed half-way up from the start. Now, you can go back down to the bottom of the wall and start running the full bricks to finish the first row, or “course.”
Step 5: Checking the rows are level – Every time, you have to make sure that rows are placed on a straight level.
Step 6: Leaving space for Grouting – You have to leave grout joints between upper & lower rows or between the adjacent bricks. The width of grout joints can be 3/8” to 1/2”.
Step 7: Installing remaining bricks – After completing half-way, the brick can be placed till ceiling following same method as explained above.
Step 8: Grouting – After you have finished placing the bricks, allow the bricks to dry for at least 24 hours. Then you can fill the grout joints using the Portland cement.
